Tape Art

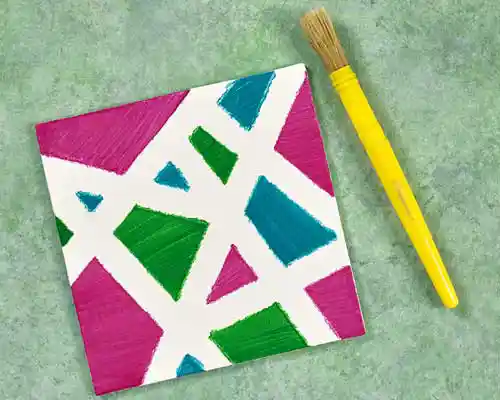
Tape Resist Art Activity for Kids
Use tape and paint to create shapes, designs, and even letters!
Use tape and paint to create shapes, designs, and even letters!
Ages/Grades
Preschool, Early Elementary, Toddlers (with modifications)
Learning Domains
Literacy, Fine Motor, Language, Cognitive/Math
Materials
• Colored tape (painter’s tape works best)
• Canvas, cardstock, tagboard or construction paper
• Paint
• Scissors
Ready, Set, Create!
![]() Cover your work surface with a tablecloth or table paper for easy cleanup.
Cover your work surface with a tablecloth or table paper for easy cleanup.
![]() Pour small amounts of paint onto palettes or shallow dishes.
Pour small amounts of paint onto palettes or shallow dishes.
![]() Set out paint brushes.
Set out paint brushes.
![]() Either set out rolls of tape and scissor, pre-cut pieces of tape, or have an adult place tape on the painting surface.
Either set out rolls of tape and scissor, pre-cut pieces of tape, or have an adult place tape on the painting surface.
![]() Place canvases, cardstock, or construction paper around the table for each child.
Place canvases, cardstock, or construction paper around the table for each child.
![]() For those who are creating their own tape designs, show children how to cut and place pieces of tape onto their work surfaces. Make sure tape is pressed down evenly, so lines are clear.
For those who are creating their own tape designs, show children how to cut and place pieces of tape onto their work surfaces. Make sure tape is pressed down evenly, so lines are clear.
![]() Once surfaces are taped, encourage children to paint on their surfaces. Children may use one color or several. They can paint right over the tape or carefully paint between the lines - both options work.
Once surfaces are taped, encourage children to paint on their surfaces. Children may use one color or several. They can paint right over the tape or carefully paint between the lines - both options work.
![]() When painting is finished, the tape may be pulled up right away, or you may let it dry. See what negative space designs children have created!
When painting is finished, the tape may be pulled up right away, or you may let it dry. See what negative space designs children have created!
Extensions
Invite older children to create letters or geometric shapes with the tape. They can even create their names or first initial in tape to be hung around the classroom.
Modifications
![]() Try using paint sticks instead of wet paint for less mess.
Try using paint sticks instead of wet paint for less mess.
![]() Instead of tape, use stickers or contact paper cut into lines or shapes to create negative space.
Instead of tape, use stickers or contact paper cut into lines or shapes to create negative space.
![]() To make pulling up the tape easier, lift an edge for a child to grip and pull.
To make pulling up the tape easier, lift an edge for a child to grip and pull.
![]() Adults can pre-cut pieces of tape for children to stick onto their work surfaces. For those who need additional support, tape may be pre-stuck onto work surfaces.
Adults can pre-cut pieces of tape for children to stick onto their work surfaces. For those who need additional support, tape may be pre-stuck onto work surfaces.
